Using the Shockbox Application on your Android Phone (ver 1.5)
|
|
|
- Marion White
- 8 years ago
- Views:
Transcription
1 Using the Shockbox Application on your Android Phone (ver 1.5) Impakt Protective thanks you for your Shockbox purchase. The Shockbox sensor and the application work together to provide you with immediate feedback on your player s impact data. The sensor gathers information about the force and direction of a hit and, if the impact is within an at-risk range, an alert will be sent to your smart phone. Impakt Protective has built its patented sensor technology to be separate from Shockbox smart phone application infrastructure. When additional features or algorithm updates are available, Impakt will communicate it to the user base via an application update through Google Play (formerly the Android Market). For Blackberry support, consult the Blackberry Application documentation located on the Shockbox support page ( ). ***NEW Shockbox HD We have been working hard at Impakt Protective, developing our next generation impact sensor called Shockbox HD. While the current Shockbox mobile application pairs and tracks impacts the same as always, the new sensor has opened up some new functionality that we are sure you will enjoy. The following highlights the features that are available on the new Shockbox HD impact sensor. Enhanced Impact Reporting The new sensor has been improved to provide more comprehensive impact data. When used with Shockbox Cloud, the data off of each helmet sensor now communicates 3- dimensional impact graphs that record the impact force of each impact event. Impact Data Storage In the situation where a mobile device is not available to receive an impact event, the sensor now stores the data for up to 16 impacts, so that this data can be downloaded once the device come back into range. Charging Indicator The new Shockbox HD device now has a charging indicator that shows the user that the device is still charging by displaying a bright blue LED light. Activity Light Shockbox HD is equipped with a flashing green light that gives the user a visual indication that the sensor is functioning properly and is ready to receive and impact after proper pairing has occurred. Always listening When charged and in motion, the sensor is always in a listening state ready to track any impact.
2 ***NEW Shockbox Cloud Web Interface ( for Android (ios coming soon) When you have properly registered a Shockbox Cloud user on an internet accessible mobile device*, every impact can be viewed on the new Shockbox Cloud web interface. *Requires a mobile device with data or wifi access. Advanced reporting is available for your player, team or association and impacts are aggregated to show 3- dimensional impact data and trends in players impacts. For more information visit: ***NEW Shockbox Mobile App Updates The following highlight the new features that are available on the Shockbox Android App: Alert Threshold Bar The Alert Threshold Bar was previously set to have a minimum magnitude threshold. We have modified the slider to remove any minimum. However, the Shockbox HD sensor is calibrated to trigger only on impact events where the estimated headform magnitude is greater than 20g. GPS Auto Notify* New Auto Sending functionality has been added to automatically send / SMS alerts to a player s contact recipients after a predetermined timer length. The alert message will contain the GPS coordinates of the last known location of the mobile device the Shockbox sensor has been paired with. *Requires a mobile device with data or Wi-Fi access. Sign in to Shockbox Cloud and Cloud Autosync* The new Shockbox Application gives the user the ability to register their mobile device to the Shockbox Cloud Web Interface. Once a user has signed into the cloud interface from their device, all player impacts will be sent automatically to the Shockbox Cloud. This represents another way to backup player data for history tracking and impact trend analysis. *Requires a mobile device with data or Wi-Fi access. System Requirements The Shockbox application requires as a minimum Android 2.2 to communicate via Bluetooth. If you are running a previous version of the Android OS, the application will not run. Downloading the Shockbox Application from Google Play You will need to be connected to the internet in order to access Google Play and download your Shockbox application. To download the Shockbox application to your phone, follow these steps:
3 1. Access Google Play on your Android phone and enter Shockbox in the Search Menu. (For more information on accessing the internet and tips on using Google Play, consult your smart phone User Guide.) 2. Click on Install to download and install the Shockbox Application. 3. Once you have downloaded the application you are ready to open it and start creating players and player contacts. ***NEW - Accessing the Shockbox Cloud Web Interface When you enter the updated Shockbox Mobile Application you will be shown the Shockbox Cloud Login screen. At this window you have a few options: Register - You can register your a new user to sync the impacts on your device with the Shockbox Cloud interface. Note: you can also register a new user by registering on the webpage directly. The user ( id) you create will upload all players associated with your device up to the Shockbox Cloud database. Once you have logged into Cloud from your mobile device, you will see all your player(s) data on the web. Sign in If you have Registered from your phone, you will need to get back into the Mobile Shockbox Application, and Sign In to sync your phone with your newly registered user. About Directs you to the Shockbox Cloud Website, for more information about Shockbox Cloud. Close You can close this window and go directly to the Shockbox Application. Click the checkbox if you do not want to see this screen again. Pairing the Shockbox Sensor to your Phone Adding a Shockbox Device Before the sensor can send any data to the smart phone, the sensor must be paired to that phone. This is necessary for the sensor and phone to communicate with each other via Class 1 Bluetooth. Note: For security reasons, the Shockbox can only be paired to one phone. Once the sensor has been paired to a phone, all previous pairings to other smart phones will be forgotten. However, previously transmitted impact data associated with that sensor will be kept on the phone (unless the user intentionally removes it).
4 In order to pair your phone and the sensor, ensure that Bluetooth has been turned on and that the sensor is fully charged. The Shockbox sensor should be initially charged for at least 3 hours prior to first pairing. To pair your Shockbox to your Android phone follow these steps: 1. From the main menu screen (shown below), press the Add Shockbox button. 2. The Add Shockbox window is displayed. 3. Press and hold the button on the Shockbox Sensor until all the lights are flashing. This will take about 5 seconds. Once all the lights are flashing, the sensor is ready to be paired to an Android smart phone. 4. To activate the pairing process on your smart phone, press the Scan button. Within a couple of seconds, all the Shockboxes that are discoverable and within range will be displayed. Press the Connect button next to the Shockbox name you would like to pair with.

5 Please note: Other devices that have Bluetooth enabled will show up in the device list as well, but will not have a Connect button associated with it. If your Shockbox is not found, press the Scan button again. 5. When you have identified the sensor you want to pair with, the Bluetooth pairing request screen will be displayed. Note: If the screen does not appear right away, be sure to check for a new notification in the pulldown bar located at the top of your Android window.

6 6. Note: If you are asked for a PIN, enter 0000 and click Ok to accept the pairing. (Skip this step if you are not asked for a PIN) 7. You will be asked to accept pairing. Please press Pair or Accept. 8. Congratulations! Your phone and Shockbox sensor are now paired. You are now ready to begin adding players. The screen on the right will be displayed asking you to either add a new player or pair up with an existing player.

7 Note: If the following Connection Failed Message continues to be displayed, view the steps to Use an Alternate Pairing Method in the Troubleshooting section at the end of this document.
8 If you choose to Create a New Player, the following Add Player screen will be displayed. Enter all the applicable information about the player and press Save. If you choose to Use an Existing Player, the following Player screen will be displayed. Be sure to press any existing player and the Shockbox will be paired with that individual.
9 Adding Players without Pairing to a Shockbox Sensor If you would like to add a number of players and pair them to Shockbox sensors at a later date, the best way to do this is as follows: From the main menu, shown below, press the Add Shockbox button. The Add Shockbox view will be displayed. You can add a new player or a list of players at this point without pairing them to a Shockbox Sensor. Do this by pressing the Skip Pairing button. (Note: This is the recommended way to add a number of players on a team. If you have a larger list of players it is easiest to add them all first and pair them up to sensors later). Once you press the Skip Pairing button, the Add Player screen is displayed. Enter all the applicable information about the player and press Save to store all the player data.

10 Editing/Deleting Players Once you have entered a list of players you can make changes to your players or delete them if necessary. Note: If you delete a player, the data for that player will be removed from the phone s internal database. If you want to keep historical impact information about a player or a group of players, export the data to a file. The export functionality is available in the Options Menu of the Shockbox application. Editing and deleting players is done from the same screen. To edit or delete player information, press and hold the player s name within the player list view. After a couple of seconds, the following menu will be displayed:
11 Press the Edit Player button to access the edit screen. From this screen you can make the necessary player modifications or delete the player information altogether.
.")
12 The Player List View From the main menu (shown below), press the View Player button to show the player list view. The Player List view is the main summary window showing the current state of all players (paired to sensors or not). Status Icons The player is ok to play and a Shockbox has been assigned to this player. This player is okay to play, but they do not have a Shockbox currently paired. NOTE: This does not guarantee that the Shockbox is paired with the player, only that the player has been assigned a Shockbox. For example, if the button on the Shockbox is pressed for 5 seconds it will become unpaired to the phone, but the mobile app will not be aware of this. 90G. The alert that is received when the player sustains an impact approaching an at-risk level (Less than 90G) The alert that is received when the player sustains an impact within an at-risk level (Greater than The player is currently recovering from concussion-like symptoms.

13 The Shockbox has a low battery (< 10%). My Contacts and Player Contacts Impakt Protective believes it is important for the trainer to have the ability to communicate with external contacts in the case of an impact event that must be followed up. This could include parents, doctors, emergency/medical staff associated with a player/team, etc. We have separated contacts that are player specific (such as parents, guardians and player s doctors) from contacts that the application holder considers necessary (911, arena staff, community medical support). The next sections explain how to enter the My Contacts list and the Player Contact information. Adding, Editing and Deleting the Contacts in the My Contacts List You can add, edit or delete the My Contact information by accessing the My Contact menu from the Main Menu.
14 Press Add My Contact and enter all the applicable information about the contact and press Save to store the data. If you are planning on setting up GPS Auto Notify (explained later) you will need to enter all the appropriate contact information here. For example, to send an auto to this player contact, a correct needs to be stored for this individual and the Auto check box needs to be checked on. To send an Auto SMS text, please ensure that the contact s phone has been correctly entered.
15 To edit contact information in the My Contact list, press the My Contacts button from the Main Menu, then select a contact to start editing. You can also delete Contacts from the My Contacts List from this screen as well. Adding, Editing and Deleting the Contacts in the Player Contacts List In order to add, edit or delete contact information associated with a specific player, you need to access the contact editing options from the Player List. Hold down the player name until the following menu is displayed:
16 To add a new contact, press the Add Player Contacts option. To edit player-specific contact information, click the View Player Contacts option. You can also delete player-specific contacts from the Player Contacts List from this screen.

17 Turning Listening On/Off To turn off listening so that Shockbox cannot communicate back to the phone, press the Listening button on the Main Shockbox screen as shown below. To turn listening back on and enable Shockbox communication to the smart phone, press the Listening button again. NeeNdf

18 Assessing a Player during an Impact Event When a player has received an at-risk impact, an alert is sent directly to the smart phone. The following screen shows how the impact is communicated. This alert signals to the Shockbox application user that the player who receives the alert needs to be assessed. Impakt Protective recommends you follow the concussion protocols that are already established within your player s sports association. If you have any doubts that a player may have suffered a concussion, sit the player down until they have been diagnosed by a physician. The following sections outline the steps that must be taken to record the player s symptoms experienced during your concussion assessment. To assess the player further or to discard the impact event, press the player s name associated with the alert. The Impact View Screen is then displayed:
19 At this point you can either perform further assessment or discard the alert. There will be cases when the player has not been involved in an at-risk impact and the sensor will still alert. Such situations may include: Impacts on the bench Direct hits with a stick or hard object on or close to the sensor Dropping the helmet on the ground Assessing an At-Risk Impact Warning: The Shockbox sensor does not diagnose or predict the possibility of a concussion. Concussions should only be diagnosed by a trained professional. The Shockbox sensor will only signal that an impact above an at-risk range has occurred. Regardless of impact detection, symptoms of head trauma should never be ignored. Presence of any of the following signs and symptoms may suggest a concussion: Loss of consciousness Seizure or convulsion Amnesia Headache Pressure in the Head Neck Pain Nausea or vomiting Dizziness Blurred Vision Balance problems Sensitivity to light/noise Feeling like in a fog Difficulty Concentrating/Remembering Fatigue Confusion Drowsiness Irritability Feeling of sadness Feelings of Nervousness or Anxiousness
20 If your player has any of these symptoms, regardless of how the Shockbox responds, remove the player from play and begin your established concussion protocols. The assessment portion of the Shockbox application has been built to emulate the steps in the Pocket SCAT2 Concussion Assessment Protocol (For more information on the SCAT2 or Pocket SCAT2 assessment process, review the links at the end of this document). When a player receives an impact that the Shockbox considers to be within an at-risk range, the application alerts you that an impact has occurred. To get more details about the impact such as player information, impact direction, time and date, and impact range, click on the player name associated with the new alert. The following Impact View Screen will be displayed. From this screen, the trainer, parent, or coach can begin the sideline assessment of the player. Hit the Assess button to being this 3-Step process. The first step is to highlight any visible player symptoms. In the situation on the first screen below the player was complaining of a headache, and was seeing stars as a result of a head impact. Once all the symptoms have been tracked, hit Next button to move to the next stage Memory Test. At this step, Shockbox will generate 3 random questions for the player being assessed. Score the player as appropriate Either Correct or Incorrect. Shockbox will move the assessment to the final stage Balance Test.


21 The following screen is displayed showing how to conduct the balance test. Once the player is in a ready stance with their eyes closed, hit the Start button. The next screen begins a countdown from 20 seconds. Each time the player moves out of position or opens their eyes during this 20-second period, an error must be recorded by pressing the Error + button. Once the time has expired, or the Error count has reached 5 errors, press the Next button to complete the test and review the summary.
.")
22 The following screen is presented after the assessment is completed. To review the symptoms for this player, swipe the screen to the left to view the Assessment screen (shown below in the middle). To communicate the result of the assessment to a parent or team doctor, swipe the screen to the right to access the Contact View (shown below on the right).
.")
23 To contact anyone on the Contact View, press the contact s name. The following options are displayed. Finally, additional notes can be kept with the Impact about the event itself by using the Notes pane on the Impact View screen (shown below). The player should not return to play until advised by a trained professional and back to play protocols have been followed. See the recommended links section at the end of this document for more information.

24 Communicating with External Contacts As part of the impact assessment process, the Shockbox user has a number of options to communicate with external contacts associated with the injured player. Consider which option best works for your team staff, parents and players. This should be discussed as part of a parents meeting at the beginning of the season. Call You can phone the contact directly SMS You can send a text message directly to a contact s phone You can send the contact an

25 NEW GPS Auto Notification We have added the functionality to the Shockbox application to have the ability to send an automatic or SMS text to a predetermined contact list in the case where an impact occurs and the individual is either unconscious or unable to contact help. The / SMS message will send the last know GPS coordinates that the phone has stored. To setup the GPS Auto Notification functionality, follow these steps: From the Shockbox home screen on the Android application, press the Options button. Scroll down to the Advanced section and select GPS Auto Notify. Once you have activated GPS Auto, you need to setup an Auto notify account if you intend to use the Auto alerts. To do this, press the Auto Notify Account option and the following screen will be displayed:

26 Enter the outgoing server account details of the application you are currently using. This needs to be an account that is on the same mobile device as the Shockbox application. For ease of use, Gmail has been added as the Default Outgoing Server and Port 465 is the Default port. To find which Outgoing Server to use, open the account settings of your client and duplicate the Outgoing Server and Outgoing Port Settings. For your Outlook client, your account screen will look similar to the screen below.
27 Once your settings have been added, press the Test Setup button. A test impact will be sent to the you just configured. If you do not receive a successful sample , you need to recheck your outgoing server, , password and SMTP port. If you have received a successful test , you can now save your settings and proceed to setting up your player contacts that will be configured. Please note that only the contacts you have associated with a given player will be notified using the GPS Auto Notify functionality. Player Contacts associated with other players will NOT be contacted. To set up the auto send contact information, add/edit a players contact information by following the steps described earlier in the Adding, Editing and Deleting the Contacts in the Player Contacts List section. Once an impact has occurred and GPS Auto Notify has been set, a countdown timer starts. The default countdown timer length for an impact event is set to 30 seconds but is configurable between 1 second and 3 minutes (180 seconds). This can be adjusted in the Options menu by modifying the timer length slider. Once the timer countdown starts, a GPS Auto Notification window (shown above) can be viewed in the Android notifications list. On this window, you can see the list of contacts to be notified, the last stored GPS location and the time remaining on the notification countdown timer. The user also had the opportunity to cancel the impact message as well as sending the message immediately.
28 Discarding an Impact Event As mentioned earlier, there are cases when an impact alert should be discarded. In such cases, press the Discard button within the Impact View screen and the player s status will return to normal. Resolving Player Symptoms As mentioned earlier, a player who was experiencing concussion-like symptoms should not return to play until they have been advised to do so by their physician or a trained professional. While the player is going

29 through their return to play steps, the Player List view displays the following icon: When the player has been cleared to return to play, you can resolve the symptoms by clicking on the player details. The following Player Recovery screen is displayed: You have the option to resolve all of the player s symptoms or select specific symptoms and resolve them

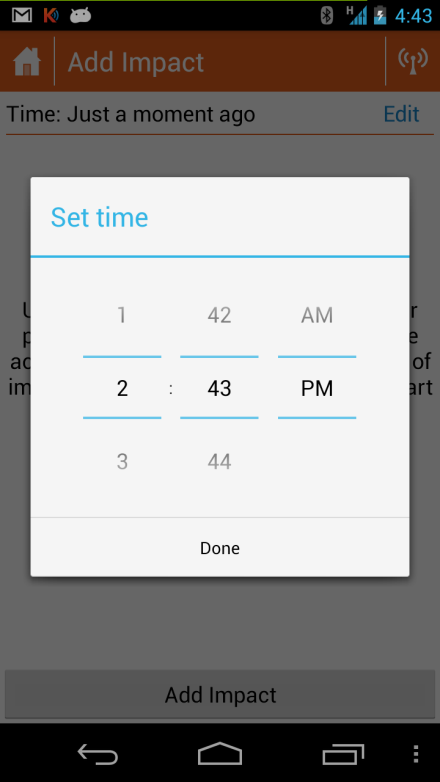
30 individually. Once all the symptoms have been resolved, Shockbox will indicate that the player has been cleared to return to play. Adding a Manual Impact through the Shockbox application The Shockbox application can be used by trainers and coaches as an effective injury management tool with or without a paired sensor. Once a player has been added to the Player list, the trainer can easily add an impact event for any player manually by following these steps. 1. On the Player List, press and hold the Player Name you want to identify as having received an atrisk head impact. 2. The Option Menu below is displayed. To add an impact manually, press the Manually Add Impact button. On the Add Impact screen press Add Impact and you will begin the Assessment process as identified earlier in the section titled - Assessing an At-Risk Impact. 3. You can also change the time of the impact by clicking Edit
31
32 Troubleshooting Situation Cause Workaround / Steps to Resolve An impact occurred, the sensor is flashing, but an alert did not get transmitted to the phone I can t pair a Shockbox sensor to my Android Phone When I press the button, the Shockbox flashes with an orange light. I can t find my Shockbox sensor in the Shockbox Pairing list I received a message A malfunctioning sensor has been detected now what should I do? I repeatedly receive a Failed to Connect to Device message when I was trying to pair. There is at least one unsent impact on the sensor. On some Android phones, after you have paired up your sensor, the phone does not clear its memory of sensors that have been paired with. We have added a message to the sensor that will alert the Shockbox application holder if the sensor is not acting as expected. Some Android phones have different pairing methods. Some workarounds to this are as follows: - Complete the repairing sequence to link the phone and the sensor together - Reset the Phone s Bluetooth functionality by turning it off and on again. - Turn listening off and on again. Contact customer support at: If the sensor is not in range of the paired phone, wait until it is, and then press the button again to flush the memory of unsent impacts. If the sensor is in range and a re-pairing is required, do a factory reset to clear the memory of any unset impacts. If you have a number of sensors to pair, after the sensor has been paired, push the button on the sensor until the green light flashes ONCE. This will clear the memory of any previous successful pairings. Contact customer support at: If you continue to receive the Failed to Connect to Device message during the pairing process, go to the Options Menu from the Main Menu screen. Click Options and find the Use Alternate Pairing Method setting. Activate this Method by checking this option.

33 Once this option has been checked, restart the pairing process. If the pairing process continues to fail, call customer support at Recommended Links The following is the link to the Links to Shockbox Cloud, the SCAT2 card and the pocket SCAT2 card. Direct link to Shockbox Cloud SCAT2 Card Pocket SCAT2 The following provides a link for the return to play steps:
THE MANAGEMENT OF CONCUSSION IN AUSTRALIAN FOOTBALL
 THE MANAGEMENT OF CONCUSSION IN AUSTRALIAN FOOTBALL AFL Research board AFL MEDICAL OFFICERS' ASSOCIATION THE MANAGEMENT OF CONCUSSION IN AUSTRALIAN FOOTBALL This document has been published by the AFL
User's Guide. [Home Network] app. Model No.
![User's Guide. [Home Network] app. Model No.](/thumbs/26/8329814.jpg "User's Guide. [Home Network] app. Model No.") User's Guide [Home Network] app Model No. Table of Contents Table of Contents 1 Welcome to the Panasonic Home Network System!...5 1.1 What is the Panasonic Home Network System?...5 1.2 What can I use it
User's Guide [Home Network] app Model No. Table of Contents Table of Contents 1 Welcome to the Panasonic Home Network System!...5 1.1 What is the Panasonic Home Network System?...5 1.2 What can I use it
Mobile Pay. for Android TM. *Android Version 4.0 or higher required
 Mobile Pay TM for Android TM *Android Version 4.0 or higher required 2014 First Data Corporation. All Rights Reserved. All trademarks, service marks and trade names referenced in this material are the
CareSentinel Set Up Guide for Android Devices
 CareSentinel Set Up Guide for Android Devices Compatible Devices: Only devices running Android 4.3 or newer support Bluetooth Smart. Any smart phone or tablet running an Android operating system older
BlackVue Cloud App Overview...3. Getting Started...6. Basic Menu Screens...15. BlackVue Cloud...24. BlackVue Wi-Fi...40. Internal Memory...
 Table of Contents BlackVue Cloud App Overview...3 Key Functions When Cloud is Connected...4 Key Functions When Wi-Fi Connection is Made...4 Key Features of Internal Memory...4 Supported Devices...5 Getting
User Guide. for Card Reader and Payment Application
 User Guide for Card Reader and Payment Application Introduction to Pogo> This document provides detailed information on how best to use the Pogo> application to benefit your business. The intention is
Two Factor Authentication (TFA; 2FA) is a security process in which two methods of authentication are used to verify who you are.
 is a security process in which two methods of authentication are used to verify who you are.") Two Factor Authentication Two Factor Authentication (TFA; 2FA) is a security process in which two methods of authentication are used to verify who you are. For example, one method currently utilized within
Two Factor Authentication Two Factor Authentication (TFA; 2FA) is a security process in which two methods of authentication are used to verify who you are. For example, one method currently utilized within
USEFUL HINTS & TIPS SAMSUNG GALAXY POCKET
 USEFUL HINTS & TIPS SAMSUNG GALAXY POCKET We really value your feedback on this useful hints & tips guide. If you feel anything is missing, or anything could be made clearer, please send your feedback
Comodo Mobile Security for Android Software Version 2.5
 Comodo Mobile Security for Android Software Version 2.5 User Guide Guide Version 2.5.111014 Comodo Security Solutions 1255 Broad Street Clifton, NJ 07013 Table of Contents 1.Introduction to Comodo Mobile
BOTTOM UP THINKING EMAIL SETUP INSTRUCTIONS. Unique businesses require unique solutions CLIENT GUIDE
 BOTTOM UP THINKING Unique businesses require unique solutions EMAIL SETUP INSTRUCTIONS CLIENT GUIDE INDEX How to connect a. Deciding on best method (POP or IMAP) Setting up email on devices Webmail a.
How To Use Textbuster On Android (For Free) On A Cell Phone
 On A Cell Phone") www.textbuster.com 1 Applications and Account Manager Dashboard User Guide For Android phones www.textbuster.com 2 Downloading the TextBuster applications After the TextBuster device is installed into
www.textbuster.com 1 Applications and Account Manager Dashboard User Guide For Android phones www.textbuster.com 2 Downloading the TextBuster applications After the TextBuster device is installed into
GROUPTALK FOR ANDROID VERSION 3.0.0. for Android
 for Android Requirements Android version 2.3 or later. Wi-Fi or mobile data connection of at least 20kbit/s network bandwidth. Optional: Bluetooth audio requires Android version 4.0.3 or later. Optional:
Administrator's Guide
 Administrator's Guide Copyright SecureAnywhere Mobile Protection Administrator's Guide November, 2012 2012 Webroot Software, Inc. All rights reserved. Webroot is a registered trademark and SecureAnywhere
A GUIDE TO IN RUGBY UNION
 A GUIDE TO The aim of this brochure is to provide information on concussion to those involved in rugby union in Ireland. Concussion MUST be taken extremely seriously. Any player with a suspected concussion
Qsync Install Qsync utility Login the NAS The address is 192.168.1.210:8080 bfsteelinc.info:8080
 Qsync Qsync is a cloud based file synchronization service empowered by QNAP Turbo NAS. Simply add files to your local Qsync folder, and they will be available on your Turbo NAS and all its connected devices.
Adding Outlook to a Blackberry, Downloading, Installing and Configuring Blackberry Desktop Manager
 Adding Outlook to a Blackberry, Downloading, Installing and Configuring Blackberry Desktop Manager The following instructions work for the District provided Blackberrys from Sprint, but I think it should
BlackBerry Desktop Software User Guide
 BlackBerry Desktop Software User Guide Version: 2.4 SWD-1905381-0426093716-001 Contents Basics... 3 About the BlackBerry Desktop Software... 3 Set up your smartphone with the BlackBerry Desktop Software...
Mobile Iron User Guide
 2015 Mobile Iron User Guide Information technology Sparrow Health System 9/1/2015 Contents...0 Introduction...2 Changes to your Mobile Device...2 Self Service Portal...3 Registering your new device...4
Concussion Information Sheet
 Concussion Information Sheet A concussion is a brain injury and all brain injuries are serious. They are caused by a bump, blow, or jolt to the head, or by a blow to another part of the body with the force
Booth Gmail Configuration
 Student email is accessed via a Booth branded Gmail service. Student mailboxes will be accessed via Gmail. Configure Gmail Settings Before you connect Gmail to send and receive Booth Gmail on your mobile
Manual. Start accepting card payments with payleven
 Manual Start accepting card payments with payleven The Chip & PIN card reader Top Magnetic stripe card reader Front Bluetooth symbol Battery life 0-button (pairing button) Cancel Back Confirmation Bottom
mysensors mysensors Wireless Sensors and and Cellular Gateway Quick Start Guide Information to Users Inside the Box
 mysensors mysensors Wireless Sensors and and Cellular Gateway Quick Start Guide Information to Users The mysensors wireless products referenced in this Quick Start Guide have been tested to comply with
Monnit Wi-Fi Sensors. Quick Start Guide
 Monnit Wi-Fi Sensors Quick Start Guide Inside the Box You should find the following items in the box: Monnit Wi-Fi (MoWi ) Sensors 2 x AA Batteries for Each MoWi Sensor Quick Start Guide Note: A MoWi USB
Setting Up Alarms in a HOBO ZW Wireless Network
 Setting Up Alarms in a HOBO ZW Wireless Network There are two types of alarms in HOBOnode Manager in HOBOware : sensor alarms and system alarms. With sensor alarms, you can set an alarm to trip when a
BlackBerry Link for Windows. Version: 1.2.3. User Guide
 BlackBerry Link for Windows Version: 1.2.3 User Guide Published: 2014-01-20 SWD-20140120093847797 Contents Related resources...5 Getting started...6 About BlackBerry Link... 6 Getting to know BlackBerry
Initial Setup of Microsoft Outlook 2011 with IMAP for OS X Lion
 Initial Setup of Microsoft Outlook Concept This document describes the procedures for setting up the Microsoft Outlook email client to download messages from Google Mail using Internet Message Access Protocol
Store & Share Quick Start
 Store & Share Quick Start What is Store & Share? Store & Share is a service that allows you to upload all of your content (documents, music, video, executable files) into a centralized cloud storage. You
User Guide. Vehicle Diagnostics by Delphi
 User Guide Vehicle Diagnostics by Delphi Table Of Contents Welcome...9 Is My Vehicle Compatible?...9 Equipment Overview...10 Package Contents...10 System Requirements...11 Installation Requirements...11
Total Baby. Backup & Sync Instructions for Version 2.0+
 Total Baby Backup & Sync Instructions for Version 2.0+ Backup! 3 Introduction and Setup! 3 How to Backup! 3 Backup using E-Mail! 4 Backup using Wi-Fi! 4 Syncing 101! 5 Introduction and Setup! 5 How it
How To Connect To Iridium.Com From A Cell Phone Or Tablet Device
 Wi-Fi connectivity Your smartphone or tablet device MUST be connected via Wi-Fi to Iridium GO! (ex. Iridium-06088 ) in order for the Iridium GO! application to login successfully and operate. Please check
Zipit Chat. Functional Specification / User Manual
 Zipit Chat Functional Specification / User Manual 1 Table of Contents 1. Zipit Chat Overview... 4 How to download... 4 Supported version... 4 2. Functionalities... 4 Get Started... 4 Login... 7 Payment
How To Sync Google Drive On A Mac Computer With A Gmail Account On A Gcd (For A Student) On A Pc Or Mac Or Mac (For An Older Person) On An Ipad Or Ipad (For Older People) On
 On A Pc Or Mac Or Mac (For An Older Person) On An Ipad Or Ipad (For Older People) On") Installation and Setup of Google Drive for Students on Mac OS X Purpose: This guide will lead you through the Google Drive Installation and Configuration. Pre-requisites: 1) ODU Student Gmail account 2)
Installation and Setup of Google Drive for Students on Mac OS X Purpose: This guide will lead you through the Google Drive Installation and Configuration. Pre-requisites: 1) ODU Student Gmail account 2)
Pogo> User Guide. for iphone, ipad and ipod touch
 Pogo> User Guide for iphone, ipad and ipod touch Introduction to Pogo> This document provides detailed information on how best to use the Pogo> application to benefit your business. The intention is to
AusCERT Remote Monitoring Service (ARMS) User Guide for AusCERT Members
 User Guide for AusCERT Members") AusCERT Remote Monitoring Service (ARMS) User Guide for AusCERT Members Last updated: 27/06/2014 Contents 1 Introduction... 2 1.1 What is ARMS?... 2 1.2 Glossary Terms... 2 2 Setting up your ARMS configuration
AusCERT Remote Monitoring Service (ARMS) User Guide for AusCERT Members Last updated: 27/06/2014 Contents 1 Introduction... 2 1.1 What is ARMS?... 2 1.2 Glossary Terms... 2 2 Setting up your ARMS configuration
Anchor End-User Guide
 Table of Contents How to Access Your Account How to Upload Files How to Download the Desktop Sync Folder Sync Folder How to Share a File 3 rd Party Share from Web UI 3 rd Party Share from Sync Folder Team-Share
Concussion Guidance for the General Public
 CONCUSSION FACTS A concussion is a brain injury. All concussions are serious. Concussions can occur without loss of consciousness. All athletes with any symptoms following a head injury must be removed
UP L18 Enhanced MDM and Updated Email Protection Hands-On Lab
 UP L18 Enhanced MDM and Updated Email Protection Hands-On Lab Description The Symantec App Center platform continues to expand it s offering with new enhanced support for native agent based device management
Migration User Guides: The Console Email Application Setup Guide
 Migration User Guides: The Console Email Application Setup Guide Version 1.0 1 Contents Introduction 3 What are my email software settings? 3 Popular email software setup tutorials 3 Apple Mail OS Maverick
Mobility with Eye-Fi Scanning Guide
 Mobility with Eye-Fi Scanning Guide Scan and Transfer Images Wirelessly with Eye-Fi This document is to be used in addition to the scanner s user guide located on the installation disc. The instructions
Mobile Phone & Website Tracking Platform Operation Guide
 Mobile Phone & Website Tracking Platform Operation Guide This software is web based system, for users to logon with given user name & password to locate the tracker s current location, play back the history
Bell Mobile Device Management (MDM)
") Bell MDM Technical FAQs 1 Bell Mobile Device Management (MDM) Frequently Asked Questions INTRODUCTION Bell Mobile Device Management provides business customers an all in one device administration tool
Bell MDM Technical FAQs 1 Bell Mobile Device Management (MDM) Frequently Asked Questions INTRODUCTION Bell Mobile Device Management provides business customers an all in one device administration tool
isecurity+ Android Guide us.zyxel.com Edition 1, 2/2012
 isecurity+ Android Guide Edition 1, 2/2012 us.zyxel.com Copyright 2011 ZyXEL Communications Corporation Login Screen After opening the isecurity+ app, you will be brought to the login screen. If you already
Quick Start Guide: Iridium GO! Advanced Portal
 Quick Start Guide: Iridium GO! Advanced Portal Contents Set-Up... 3 Overview... 4 Main Tab 1: General... 5 Status.... 5 Settings... 8 Audio.... 8 GPS.... 9 Tab 2: Communication... 9 Wi-Fi... 9 Satellite...
How to install and use the File Sharing Outlook Plugin
 How to install and use the File Sharing Outlook Plugin Thank you for purchasing Green House Data File Sharing. This guide will show you how to install and configure the Outlook Plugin on your desktop.
mysensors mysensors Wireless Sensors and Ethernet Gateway Quick Start Guide Information to Users Inside the Box mysensors Ethernet Gateway Quick Start
 mysensors Information to Users mysensors Wireless Sensors and Ethernet Gateway Quick Start Guide This equipment has been tested and found to comply with the limits for a Class B digital devices, pursuant
Information Technology Services. *** Please visit tlc.dadeschools.net/blackberry for more information on your BlackBerry model.
 *** Please visit tlc.dadeschools.net/blackberry for more information on your BlackBerry model. *** BlackBerry Training Presented by Information Technology Services Before we begin If you have a problem
DocuSign Connect for Salesforce Guide
 Information Guide 1 DocuSign Connect for Salesforce Guide 1 Copyright 2003-2013 DocuSign, Inc. All rights reserved. For information about DocuSign trademarks, copyrights and patents refer to the DocuSign
Advanced Configuration Steps
 Advanced Configuration Steps After you have downloaded a trial, you can perform the following from the Setup menu in the MaaS360 portal: Configure additional services Configure device enrollment settings
Frequently Asked Questions: Cisco Jabber 9.x for Android
 Frequently Asked Questions Frequently Asked Questions: Cisco Jabber 9.x for Android Frequently Asked Questions (FAQs) 2 Setup 2 Basics 4 Connectivity 8 Calls 9 Contacts and Directory Search 14 Voicemail
Compliance Rule Sets in MaaS360
 Compliance Rule Sets in MaaS360 MaaS360 allows you to apply sets of compliance rules on mobile devices. These rules are conditions that are checked on devices on real-time basis. If a device is not in
Vehicle Monitoring Quick Reference Guide
 Vehicle Monitoring Quick Reference Guide Powered by Delphi Welcome You re about to experience a powerful device that will deliver a new level of convenience and peace of mind with your vehicle. When combined
User Guide Online Backup
 User Guide Online Backup Table of contents Table of contents... 1 Introduction... 2 Adding the Online Backup Service to your Account... 2 Getting Started with the Online Backup Software... 4 Downloading
Fingerprint Identity User Manual for the Griaule Biometric Framework 040-0103-01 Rev 1.00
 Fingerprint Identity User Manual for the Griaule Biometric Framework 040-0103-01 Rev 1.00 www.griaulebiometrics.com Brazil Phone: 55-19-3289-2108 USA Phone: (408) 490 3438 Fingerprint Identity Index Getting
USER MANUAL. v. 1.0.0.95 Windows Client ------------------------ January 2014 ------------------------
 USER MANUAL v. 1.0.0.95 Windows Client ------------------------ January 2014 ------------------------ 1 Contents At a Glance Troubleshoot 3 About SkyCrypt 23 FAQ 4 About this manual 23 Contact support
User Guide. Time Warner Cable Business Class Cloud Solutions Control Panel. Hosted Microsoft Exchange 2007 Hosted Microsoft SharePoint 2007
 Chapter Title Time Warner Cable Business Class Cloud Solutions Control Panel User Guide Hosted Microsoft Exchange 2007 Hosted Microsoft SharePoint 2007 Version 1.1 Table of Contents Table of Contents...
User Manual ELECTRONIC KEYPAD LEVERSET WITH BLUETOOTH PROGRAMMING. ASSA ABLOY, the global leader in door opening solutions
 User Manual ELECTRONIC KEYPAD LEVERSET WITH BLUETOOTH PROGRAMMING ASSA ABLOY, the global leader in door opening solutions ELECTRONIC KEYPAD LEVERSET WITH BLUETOOTH PROGRAMMING Lever buttons Keyed Cylinder
Licensing Guide BES12. Version 12.1
 Licensing Guide BES12 Version 12.1 Published: 2015-04-02 SWD-20150402115554403 Contents Introduction... 5 About this guide...5 What is BES12?...5 Key features of BES12... 5 About licensing...7 Steps to
MobileMerchant Application Guide
 MobileMerchant Application Guide United Kingdom Ireland Version 6 Android: Google Play is a trademark of Google Inc. Apple: Apple, the Apple logo, iphone and ipad are trademarks of Apple Inc., registered
WAM Remote Wireless Asset Monitoring. Website User Guide
 WAM Remote Wireless Asset Monitoring Website User Guide Table of Contents Overview... 2 Login Page... 2 Quick Start Guide...3-4 Locations Page... 5 Devices Page... 5 Register Devices Page... 6 Temp or
BlackBerry Link for Windows. Version: 1.1.1. User Guide
 BlackBerry Link for Windows Version: 1.1.1 User Guide Published: 2013-07-22 SWD-20130722144723525 Contents Getting started...5 About BlackBerry Link... 5 Getting to know BlackBerry Link...5 Connecting
Kaseya 2. User Guide. Version 1.0
 Kaseya 2 Mobile Device Management User Guide Version 1.0 March 12, 2012 About Kaseya Kaseya is a global provider of IT automation software for IT Solution Providers and Public and Private Sector IT organizations.
ADMINISTRATOR GUIDE FOR USA MOBILITY AMC SELECT
 ADMINISTRATOR GUIDE FOR USA MOBILITY AMC SELECT AMC Select Administrator Guide 1 March 5, 2013 This page intentionally left Blank. AMC Select Administrator Guide 2 March 5, 2013 I. INTRODUCTION... 4 II.
U.S. Cellular Mobile Data Security. User Guide Version 00.01
 U.S. Cellular Mobile Data Security User Guide Version 00.01 Table of Contents Install U.S. Cellular Mobile Data Security...3 Activate U.S. Cellular Mobile Data Security...3 Main Interface...3 Checkup...4
owncloud Configuration and Usage Guide
 owncloud Configuration and Usage Guide This guide will assist you with configuring and using YSUʼs Cloud Data storage solution (owncloud). The setup instructions will include how to navigate the web interface,
OPS Data Quick Start Guide
 OPS Data Quick Start Guide OPS Data Features Guide Revision: October, 2014 Technical Support (24/7) - (334) 705-1605 http://www.opelikapower.com Quick Start Guide OPS Data: Beginning today, you have access
How To Use Swol On Pcode (For Athletes)
") 101 Tosca Drive Stoughton, MA 02072 USA (Phone) 781.297-2034 (FAX) 781.297-2039 (Web) www.csmisolutions.com SportsWareOnLine User Manual SportsWare and SportsWareOnLine are trademarks of Computer Sports
101 Tosca Drive Stoughton, MA 02072 USA (Phone) 781.297-2034 (FAX) 781.297-2039 (Web) www.csmisolutions.com SportsWareOnLine User Manual SportsWare and SportsWareOnLine are trademarks of Computer Sports
SwannEye HD Security Camera Wi-Fi Connections Quick Setup Guide. Welcome! Lets get started.
 EN SwannEye HD Security Camera Wi-Fi Connections Quick Setup Guide Welcome! Lets get started. 1 1 Introduction 1 2 3 4 Congratulations on your purchase of this SwannEye HD Wi-Fi Security Camera from Swann!
AT&T U-verse App for iphone FAQ s
 About AT&T U-verse What is AT&T U-verse for iphone? The AT&T U-verse for iphone is a service that provides all U-verse subscribers with the ability to view their U-verse TV Guide, manage their home DVR,
CHAPTER 2: USING THE CAMERA WITH THE APP
 TABLE OF CONTENTS OVERVIEW... 1 Front of your camera... 1 Back of your camera... 2 ACCESSORIES... 3 CHAPTER 1: Navigating the Mobile Application... 4 Device List: How to Use this Page... 4 My Messages:
Basic Software Setup Guide. www.easyclocking.com
 1 Basic Software Setup Guide www.easyclocking.com 2 Table of Contents Software registration 3 How to connect the time clock.. 5 How to turn the time clock on 5 Defining the type of connection... 5 TCP/IP
IHSA Sports Medicine Acknowledgement & Consent Form. Concussion Information Sheet
 Concussion Information Sheet A concussion is a brain injury and all brain injuries are serious. They are caused by a bump, blow, or jolt to the head, or by a blow to another part of the body with the force
GO!Enterprise MDM Device Application User Guide Installation and Configuration for BlackBerry
 GO!Enterprise MDM Device Application User Guide Installation and Configuration for BlackBerry GO!Enterprise MDM Version 4.11.x GO!Enterprise MDM for BlackBerry 1 Table of Contents GO!Enterprise MDM for
Getting Started. Getting Started with Time Warner Cable Business Class. Voice Manager. A Guide for Administrators and Users
 Getting Started Getting Started with Time Warner Cable Business Class Voice Manager A Guide for Administrators and Users Table of Contents Table of Contents... 2 How to Use This Guide... 3 Administrators...
User Manual. Updated for igrill 2.7.1 and ios 7
 User Manual Updated for igrill 2.7.1 and ios 7 Table of Contents 1. Getting Started... 3 2. Quick Start Instructions... 4 3. igrill Instructions... 5 3.1 Batteries... 5 3.2 Probes... 5 3.3 Fahrenheit or
Abila Grant Management. Document Management
 Abila Grant Management This is a publication of Abila, Inc. Version 2014 2014 Abila, Inc. and its affiliated entities. All rights reserved. Abila, the Abila logos, and the Abila product and service names
NETGEAR genie Apps. User Manual. 350 East Plumeria Drive San Jose, CA 95134 USA. August 2012 202-10933-04 v1.0
 User Manual 350 East Plumeria Drive San Jose, CA 95134 USA August 2012 202-10933-04 v1.0 Support Thank you for choosing NETGEAR. To register your product, get the latest product updates, get support online,
www.novell.com/documentation User Guide Novell iprint 1.1 March 2015
 www.novell.com/documentation User Guide Novell iprint 1.1 March 2015 Legal Notices Novell, Inc., makes no representations or warranties with respect to the contents or use of this documentation, and specifically
Email Set Up Instructions
 Email Set Up Instructions Email Support...1 Important Fist Steps for all Users...2 DO YOU KNOW YOUR USERNAME AND PASSWORD?...2 Install the Despaminator CompanyV Certificate...2 What is Your Mail Client?...2
GO!Enterprise MDM Device Application User Guide Installation and Configuration for Android
 GO!Enterprise MDM Device Application User Guide Installation and Configuration for Android GO!Enterprise MDM for Android, Version 3.x GO!Enterprise MDM for Android 1 Table of Contents GO!Enterprise MDM
Table of Contents. Oxygen Web Client... 34 Uploading my files... 34 Versioning my files... 34 Deleting my files... 36
 Oxygen User Guide Table of Contents What is Oxygen Cloud?... 3 Getting Started with Oxygen!... 4 Registering... 4 Access My Files from Any Device... 6 What is an Oxygen Space?... 7 Types of Spaces... 8
ONE Mail Direct for Mobile Devices
 ONE Mail Direct for Mobile Devices User Guide Version: 2.0 Document ID: 3292 Document Owner: ONE Mail Product Team Copyright Notice Copyright 2014, ehealth Ontario All rights reserved No part of this document
Madi, The Little Paper Pantry
 Madi, The Little Paper Pantry In this guide: Getting started Applying for PayPal Here Logging in to the app Setting up your business profile Setting up an item list Your card reader Your card reader Your
Revised 10-4-10 Bethel Park s Sports Concussion and Closed Head Injury Protocol and Procedures for Student-Athletes
 Bethel Park s Sports Concussion and Closed Head Injury Protocol and Procedures for Student-Athletes If the Certified Athletic Trainer of Bethel Park School District has a concern that a student-athlete
Configuring an Email Client to Connect to CASS Mail Servers
 Configuring an Email Client to Connect to CASS Mail Servers Table of Contents Introduction... 2 Webmail... 2 Settings... 2 Forwarding... 2 Email Client Configuration... 3 Outlook 2003... 3 Outlook 2007...
NetIQ. How to guides: AppManager v7.04 Initial Setup for a trial. Haf Saba Attachmate NetIQ. Prepared by. Haf Saba. Senior Technical Consultant
 How to guides: AppManager v7.04 Initial Setup for a trial By NetIQ Prepared by Haf Saba Senior Technical Consultant Asia Pacific 1 Executive Summary This document will walk you through an initial setup
SmartWatch Eco/Eco Compact
 SmartWatch Eco/Eco Compact Digital Video Recorders SmartWatch Eco SmartWatch Eco Compact Mobile Application Installation & Operation Manual Table of Contents Introduction...3 Installation and Operation
GEM90 TrackMe GPS Tracking Application
 GEM90 TrackMe GPS Tracking Application Quick Start Guide (Version 1.8 2015) 1. Introduction 1.1. Overview Gem90 TrackMe is a GPS enabled tracking application that is part of the Gem90 product series. Gem90
8x8 Virtual Office Mobile User Guide for Android
 8x8 User Guide for Android May 2012 The Champion For Business Communications Table of Contents Introduction... 3 Verify Your Android Version...4 Getting Started.... 5 Installation......................................
What is a concussion? What are the symptoms of a concussion? What happens to the brain during a concussion?
 What is a concussion? The working definition used today for concussion is a complex pathophysiological process affecting the brain, induced by traumatic biomechanical forces (developed by the consensus
SwannSecure Wi-Fi Monitoring System
 EN SwannSecure Wi-Fi Monitoring System Setup Wizard Quick Start Guide QW470KIT050115E Swann 2015 1 Welcome The Setup Wizard automatically launches the first time you turn on the Wi-Fi Monitor and walks
How To Connect A300 To A300 Time Clock On A Pc Or Mac Computer
 1 TABLE OF CONTENTS INTRODUCTION CHAPTER 1 ESTABLISHING A CONNECTION TO TIME CLOCK 1.1 INSTALLATION OF SOFTWARE 1.2 CONNECT TIME CLOCK TO PC 2 1.2.A..VIA USB CABLE CONNECTION 2-5 1.2.B... VIA TCP/IP NETWORK
Junos Pulse for Google Android
 Junos Pulse for Google Android User Guide Release 4.0 October 2012 R1 Copyright 2012, Juniper Networks, Inc. Juniper Networks, Junos, Steel-Belted Radius, NetScreen, and ScreenOS are registered trademarks
Mobile Device Manual for 3G DVRs
 Mobile Device Manual for 3G DVRs The 3G DVR can be monitored with APPS for supported mobile device operating systems. Please refer to the table below for your specific mobile device application. Please
QUICK START GUIDE Bluetooth Cordless Hand Scanner (CHS)
") QUICK START GUIDE Bluetooth Cordless Hand Scanner (CHS) 1D Imager Models CHS 7Ci, 7Di, 7DiRx LED Trigger button Power button (also for ios Keyboard Pop-up) Model shown: CHS 7Di This document pertains to
QUICK START GUIDE Bluetooth Cordless Hand Scanner (CHS) 1D Imager Models CHS 7Ci, 7Di, 7DiRx LED Trigger button Power button (also for ios Keyboard Pop-up) Model shown: CHS 7Di This document pertains to
The Cancer Institute NSW Grants Management System User Guide
 The Cancer Institute NSW Grants Management User Guide Version 1.1 12 February 2016 Contents 1. Registration 2 2. Login to the Institute s GMS 3 3. Forgot password 3 4. The home page 4 5. Creating a profile
GadgetTrak Mobile Security Android & BlackBerry Installation & Operation Manual
 GadgetTrak Mobile Security Android & BlackBerry Installation & Operation Manual Overview GadgetTrak Mobile Security is an advanced software application designed to assist in the recovery of your mobile
Quick Start Guide. Version R9. English
 Mobile Device Management Quick Start Guide Version R9 English February 25, 2015 Agreement The purchase and use of all Software and Services is subject to the Agreement as defined in Kaseya s Click-Accept
SPC Connect Configuration Manual V1.0
 SPC Connect Configuration Manual V1.0 I-200090-1 28.11.2014 Copyright Copyright Technical specifications and availability subject to change without notice. Copyright Siemens AB We reserve all rights in
APNS Certificate generating and installation
 APNS Certificate generating and installation Quick Guide for generating and installing an Apple APNS Certificate Version: x.x MobiDM Quick Guide for APNS Certificate Page 1 Index 1. APPLE APNS CERTIFICATE...
Last modified: November 22, 2013 This manual was updated for the TeamDrive Android client version 3.0.216
 Last modified: November 22, 2013 This manual was updated for the TeamDrive Android client version 3.0.216 2013 TeamDrive Systems GmbH Page 1 Table of Contents 1 Starting TeamDrive for Android for the First